Airbrush
Airbrush Assembly
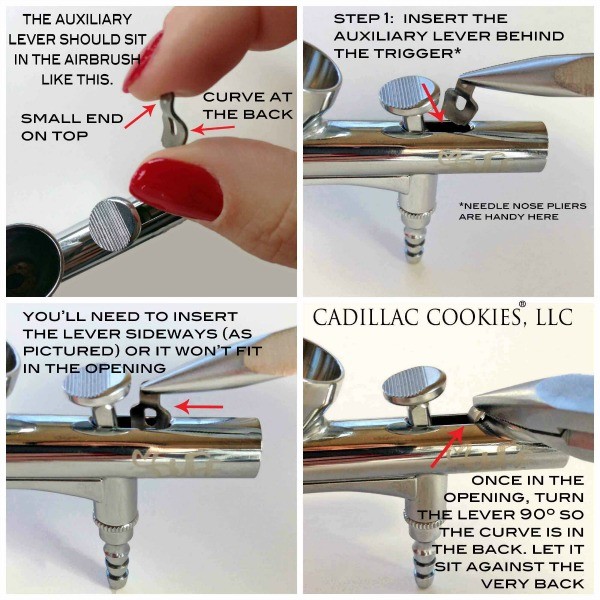
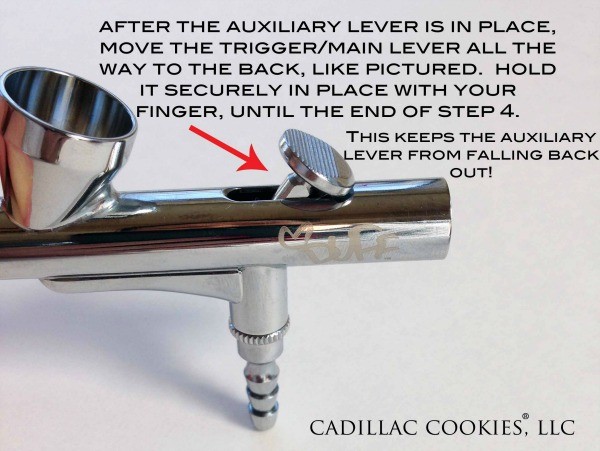
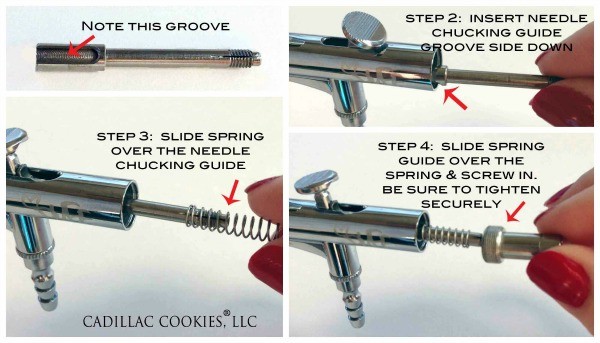
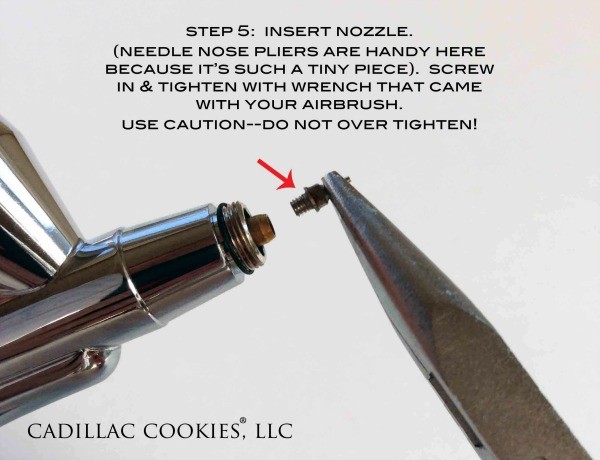
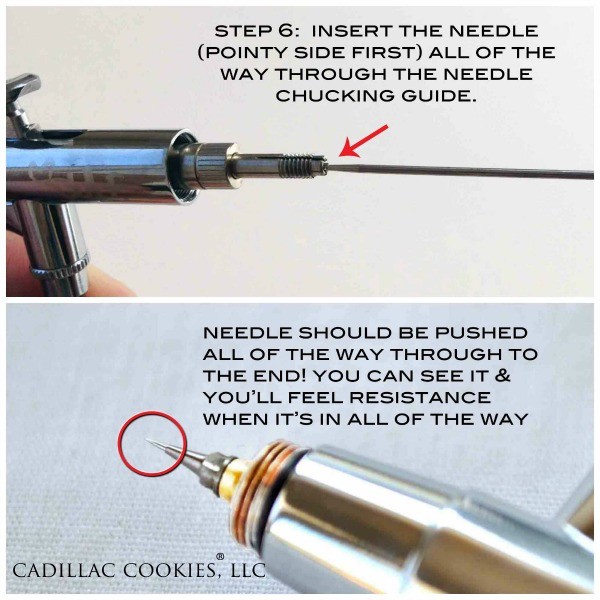
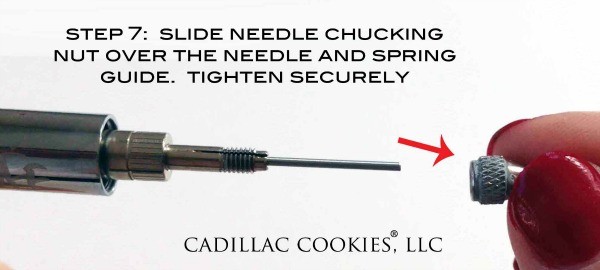
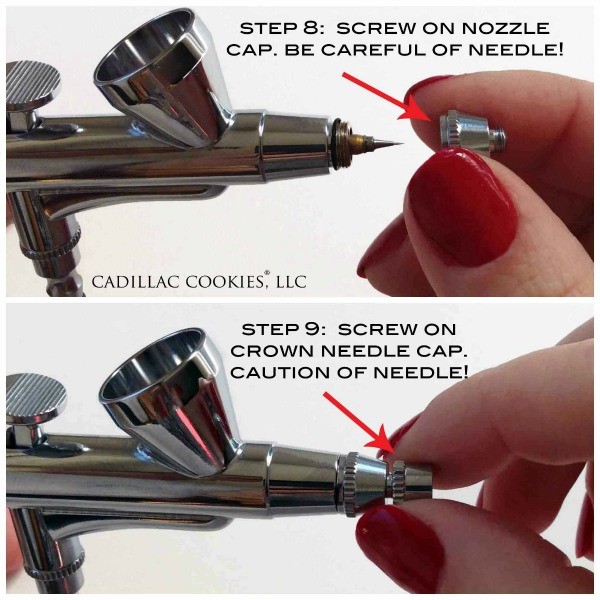
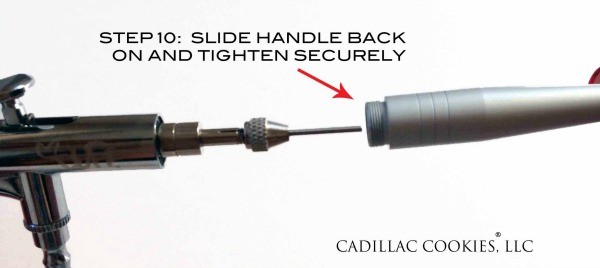
To assemble, follow the instructions below:
After you’ve replaced and tightened the spring guide (Step 4), double check your trigger. Pull it back and make sure it’s not too loose. If it feels too loose, then you’ve not tightened the spring guide enough.
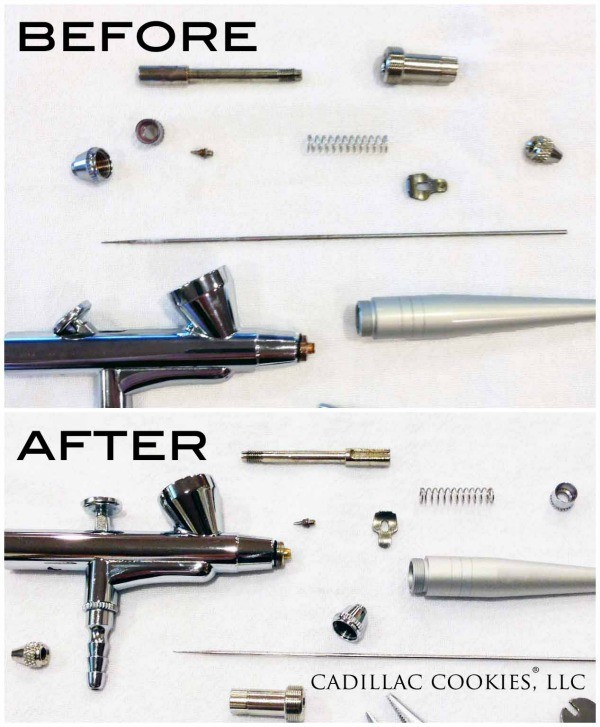
Voila! Your airbrush is clean! Here’s a before and after. You can really see the difference.
How to Take Apart and Clean Your Airbrush - The Sweet Adventures of Sugar Belle
Airbrush cleaning
Cleaning your airbrush might seem complicated at first, but once you know the basics, you don’t need a mechanical engineering degree to do it.
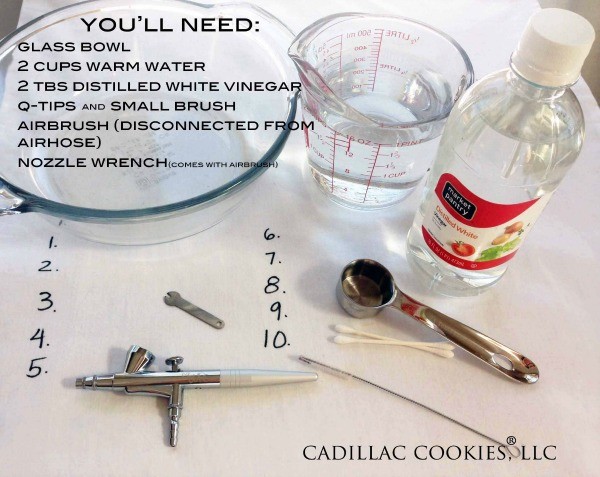
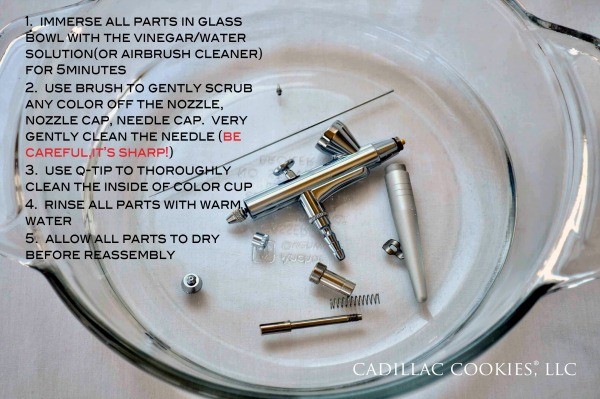
First, mix two tablespoons of white distilled vinegar with two cups warm distilled water (tap water is ok if you don’t have hard water) in a glass bowl and set aside. You can also use premixed airbrush cleaner, but be sure not to use any products that contain ammonia. It will corrode the brass parts & cause a funky build up. Ick!
Before taking apart your airbrush, make sure it is disconnected from the air hose. You’ll want to work on a flat, clean, light colored surface. Some of these pieces are itty bitty, and can be hard to find if you drop them (trust me). I use a white pillow case that I’ve numbered from one to ten. It’s washable and the labeling helps me keep the parts in the same order that I removed them in. I just spread that over my work table, and it makes the process go much more smoothly.
Note: I’m demonstrating with a Duff airbrush, but all gravity feed airbrushes are essentially the same. The only difference between cleaning the Duff and KopyKake airbrushes is that the trigger/main lever can be removed from the KopyKake model.
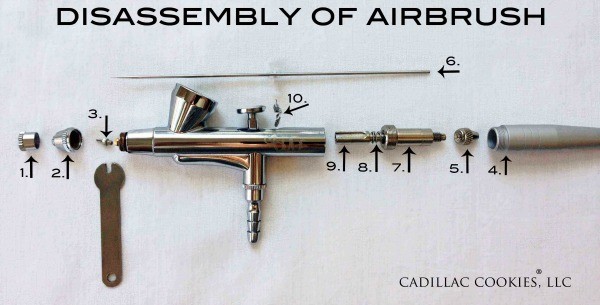
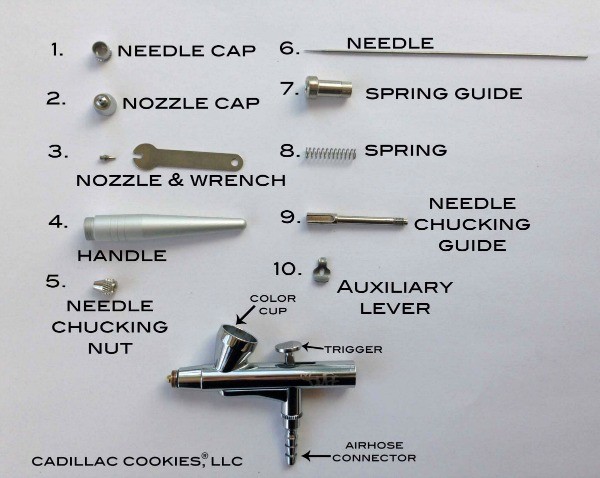
Now, for the fun…disassemble the airbrush in the order below. Here are some very brief instructions. Keep in mind there are a few different approaches, this is just my preference.
1. Unscrew needle cap
2. Unscrew nozzle cap
3. Use wrench to loosen and remove nozzle
4. Unscrew handle
5. Unscrew needle chucking nut
6. Very carefully remove needle, by pulling it out, towards the back. Sometimes, you might need to twist it a tad.
7. Unscrew spring guide. The threading is long, so it might take a while.
8. Remove spring
9. Pull out needle chucking guide
10. Remove auxiliary lever, by twisting 90º and pulling straight out.
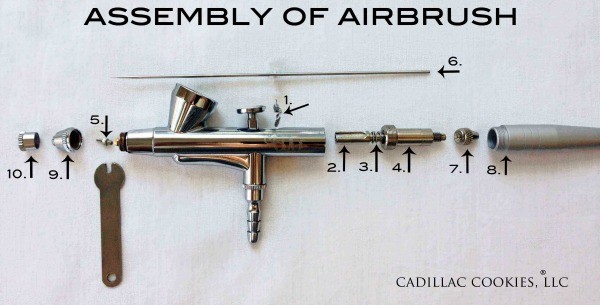
Have you ever wondered what all of these parts are called? No worries, I’ve labeled them just for you! That’s a mouth full, right?
Once you’ve disassembled your airbrush, you’re ready to clean it. It’s amazing all of the color build up you don’t see until you take it apart.
Keep in mind, it’s best not to let your airbrush parts soak overnight. It will not ruin your airbrush, but it can completely remove the lubrication that allows the airbrush to work smoothly.
